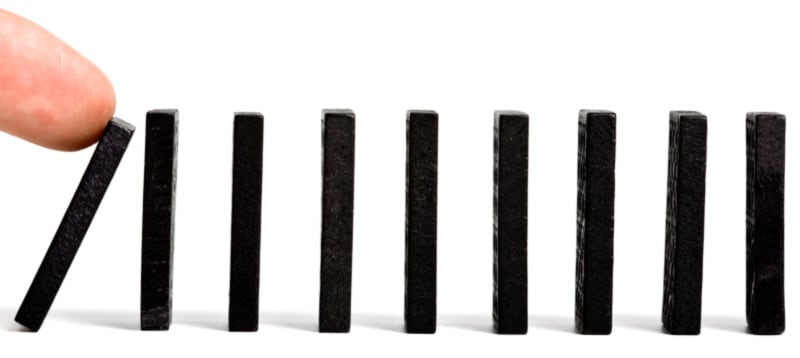
THREE BASIC RULES TO AVOID THE DOMINO EFFECT IN YOUR MIX:
1. first things first
Look into your monitoring
First rule: big decisions require small speakers, small decisions require big speakers.
Especially when your room is untreated, there’s no point to use huge monitors with massive low-end. Instead, mix through a smaller window and make decisions as if you were walking by.
Sounds cryptic? Here’s all you need to know.
Treat your room
Less than $ 300 can make a huge difference for your mix room. Here’s what to do.
Know the musical context of your low end
Look at Kick and Bass in a musical context, and you’ll have a better chance of organically sorting out your low-end. If the fundamental frequency of your Kick corresponds with the songkey, and none of the lowest bass-notes are out of hand dynamically, things are a lot more likely coming together, as opposed to doing some random EQing in the low-end.
Here are two examples of how to look into this: (EXAMPLE 1 + EXAMPLE 2)
2. The bottom-up approach.
Uh-oh, I’m hitting you with another fancy term…
…well not really fancy, as in this case bottom-up approach applied to mixing can be taken very literal.
Because low frequencies (= bottom) have a lot more physical energy than mids or highs, we always take care of them first.
The „Bottom-up approach“ in EQing
Get the lower frequencies of each sound right before you shape mids and highs.
Look at each sound consisting of a tone and a noise component.
As a priority, remove unwanted low-end rumble first, then make sure to get the TONE right. The TONE consists of the fundamental notes and 1st harmonics of each sound – make sure it’s round, well-balanced and NOT overly resonant.
Once you got the TONE right, look at the balance of tone and noise in each sound. This can be as simple as a high shelf EQ above 3K, adding frequencies if you want more sizzle in a synth, more fret-noises in a guitar, or more click in a kick drum.
The „Bottom-up approach“ in Compression
The meters in your DAW can fool you. Spikes on Peak Meters are mostly caused by High Frequencies, and the first impulse would be to apply compression or limiting to get a more controlled sound by reducing those. NOT REALLY… – reducing or removing peaks using a superfast compressor or brickwall limiter at this stage won’t give you a very musical result.
In reality, the loudness (= RMS level) of your signal is a lot more affected by the lower frequencies in your signal.
Unless your dealing with drums or percussion, the first compressor in your plug-in or effect-chain needs to be a slower, more musical compressor. More musical meaning with a slow attack time, a low compression ratio, high threshold, and many times, a compressor that adds tone via harmonical distortion which makes your low-end more perceptible on smaller speakers.
(more on compression and harmonics HERE)
The bottom-up approach in Gain Staging
The context of all this is of course the gain structure of your mix. You can find a complete tutorial on gain staging HERE.
3. installing handles for the core-parameters of each track/instrument
The notion that you can just set and forget a sound while you’re mixing, is a misconception.
Take a kick drum for example, you will never be able to determine the final amount of low-end in the kick without the context of the bass, and of course your mix-bus and mastering-chain.
On some mixes the kick already comes with a lot of low-end, on others it’s slim but well-balanced with the bass, and you dial in the final amount of low-end with a Pultec on our mix-bus.
Let’s not forget why a mastering-guru like Brian Gardner has the nickname „Big Bass“ – if your mix is well-balanced and dynamic, your mastering engineer has a much better chance to give you the maximum low-end energy as opposed to you boosting your kick at the start of your mix, and slamming 0dB on the digital meters right away.
But how do you control these things throughout the different stages of your mix?
Here’s where the „handles“ come into play.
Let’s stay with the example of the Kick.
The basic handles would be:
1. a roll-off for unwanted subsonic energy (between 0 and 60 Hz)
2. a bell curve EQ on your exact fundamental tone of your kick (between 40 and 70 Hz)
3. a bell curve EQ on the 2nd harmonic aka pressure point of your kick (an octave up from the fundamental = between 80 and 140 Hz)
4. a shelf EQ for anything higher than 300Hz
5. a transient shaper/designer to control the level of the initial transient aka „click“ of your kick
Installing these handles doesn’t mean that you boost or cut anything right away, BUT identifying these frequencies and setting them will allow you to have FULL CONTROL over your Kick throughout the entire mixing process and to deal with the balance IF and WHEN it comes up.
Towards the end of your mix, you might find that you need to cut a bit of the fundamental to make space for your bass, and to boost the first harmonic to give it more punch.
If you use a final mix bus EQ to give your entire mix more „oomph“, you will very likely need to reduce the fundamental tone, to have enough leeway for the bass-boost.
The concept of handles applies to any sound in your mix, but the type of parameters are obviously different depending on the source.
Just to give you another example, the following are the most useful handles on a lead-vocal:
LEAD VOCAL handles:
1. sibilance: a de-esser to reduce it if necessary
2. weight and warmth: a wide bell EQ around the fundamental notes of the lead vocal
3. presence: various EQs around the mids, can range between 1 – 8k
4. attitude: a compressor that keeps the lead vocal upfront
The point of installing handles on your source material is that they will be there when you need them. At any stage of your mixing process you have the tools at hand to re-balance all tonal and dynamic aspects of your mix. These are often subtle changes, but the reason we need access to them ALL THE TIME, NOT JUST when an issue comes up, is to avoid what this article is about: the Domino Effect.


