Mixing is 80% preparation and 20% inspiration…
However, mix preparation is NOT mixing. Ideally, it is a process separate from the actual mixing. Many top engineers delegate this to their assistants, to be able to start the mix with fresh ears.
It’s NOT a trivial task – those assistants working with the world’s best mix engineers are top engineers in their own league!
If you’re interested in working with a mix template that follows all these recommendations, check out MIX TEMPLE PRO – now available for Logic Pro X, ProTools, Ableton and Cubase and Studio One.
WHAT IS MIX PREPARATION?
Mix preparation is drawing the final line between the definite end of production, and the start of the mix, and has two primary objectives:
1. Micro-Management: to check the individual audio- tracks of the production „under the microscope“ and fix obvious flaws
2. Macro-Management: to make the mix manageable
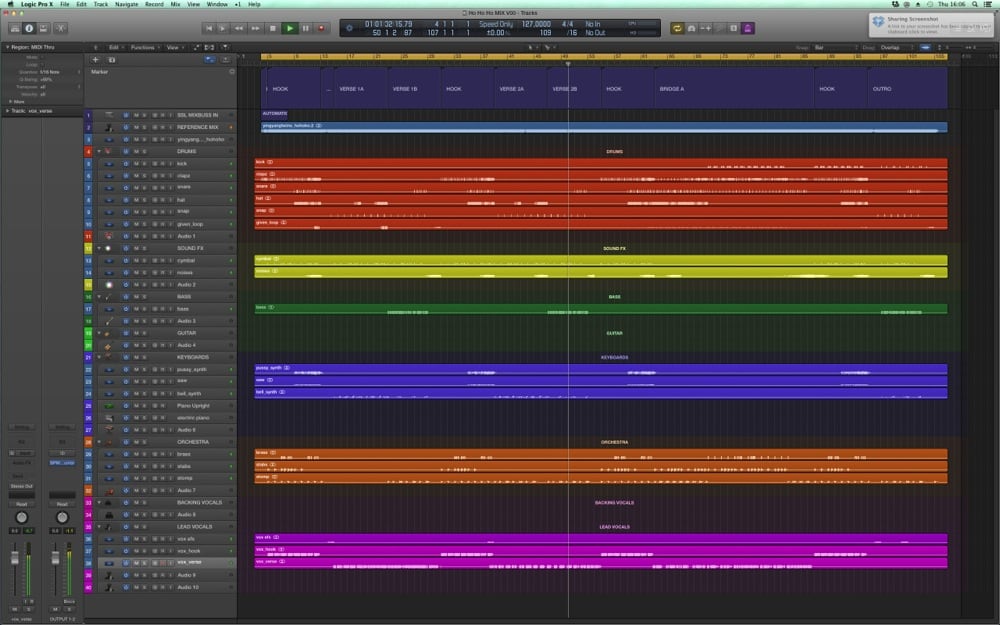
example: song structure

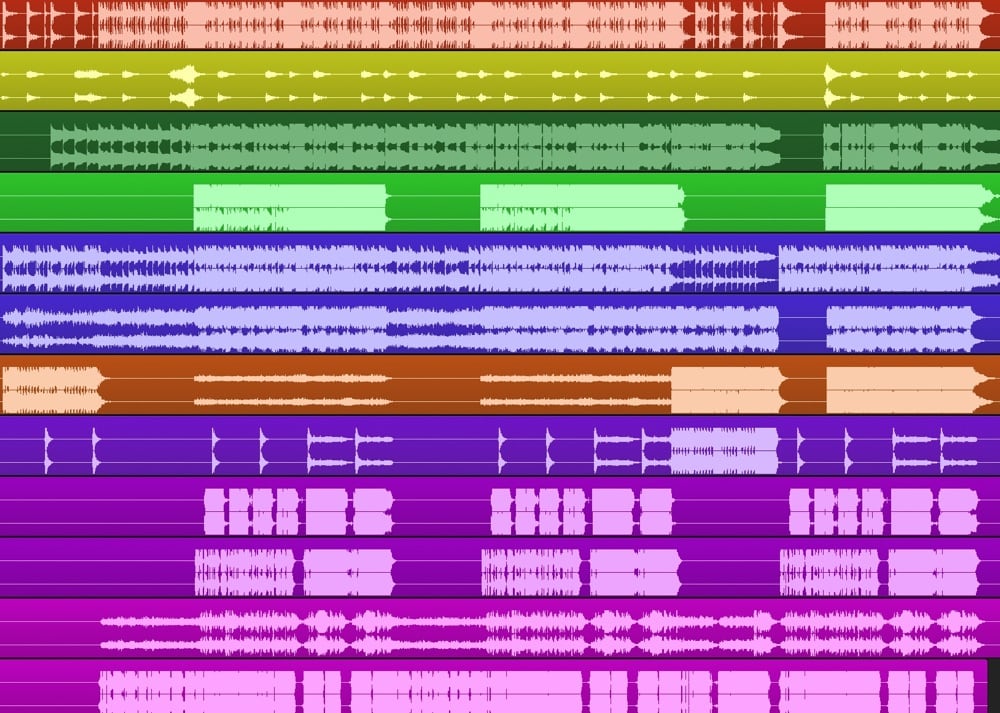
example: tracks organized by colors and instrument groups
MIX PREPARATION – BASIC FIRST STEPS
Before we go into the details – here are the basic first steps:
• downloading the files: files will usually be supplied through a download-link or a shared web-space like Dropbox, Google Drive, OneDrive, box.com or similar. Do not worry if the files come as a .zip or .rar-file. Those compress the size of the files into a smaller package, but once decompressed, the audio files are the same as the original.
• ALWAYS import the audio files of the production into an entirely new session
• work in 24bit (or higher) and in the sample-rate that was used by the producer, most commonly 44.1 or 48kHz
• you may get files in a „high sample rate“ (88.2, 96, 176.4, 192 or even up to 384kHz), whether you can use those for your DAW-session depends purely on the CPU-power of your computer
• if in doubt, convert down to 44.1kHz, as constant „CPU Overload“ messages will seriously disrupt your workflow.
MIX PREPARATION – MICRO MANAGEMENT
This first part of Mix Preparation only takes a lot of time if the producer hasn’t done his homework – it’s easy for the producer to do this at his end of the production, as part of printing the individual track files.
Oh, maybe you are the producer. I have some thoughts on mixing your own production in another blog post, but for now just keep in mind that it is all about making production and mix two completely separate jobs.
The tasks involved here are overlapping with what many producers do when they print their files for mixing:
• removing unwanted noises and clicks
• if necessary, replacing clicks and transitions between noise/silence and signal with little fades or crossfades.
• removing low-end rumble with a High Pass Filter. Be careful not to cut too high, and use a linear phase EQ. An analyzer can help to visually show you what’s useable signal, und whats just useless low-end rumble.
• fix obvious flaws related to tuning and timing, unless they are intended. Keep in mind that there is a fine line between fixing a flat or sharp note, and overdoing tuning.
• you can do some very broad EQ-ing at this stage, if you feel it’s necessary – just as an example, tracks of Electric Guitars, Piano and Bass Guitar typically lack High Frequencies. If you feel confident about doing broad EQ strokes at this point – go for it. Don’t touch EQ of drums or vocals though. They’re too complex to make broad decisions on at this point.

• every now and then I receive vocals that are severely over-compressed and/or over-EQ’d, and you can always spot that in the quality of the „Esses“ aka sibilance. If the vocals you have to start with already have a problem in this area, they need extra attention
• print all the changes you’ve made here to a new audio file, and re-import it
• if you find ways to reduce the numbers of tracks you have to deal with: do it! Example: convert two mono backing vocals into a stereo-file hard-panned L/R.
CONCEPTS FOR FIXING VOCALS THAT SEEM HOPELESS:
Fixing a vocal with excessive Sibilance (Esses)
The problem is often that when the lead vocal has al- ready been compressed during tracking, and has exces- sive sibilance, a DeEsser can’t reliably detect the Esses in the recording
1. first create different versions of the vocal-track you want to rescue using a De-Esser, next print the DeEssed versions to new files as follows:
A: untreated
B: light De-Essing applied
C: extreme De-Essing applied
2. Stack the audio-files as tracks underneath each other in your DAW, keep all the tracks selected and cut them at the same time to separate the Esses out.

You can see in the waveform-graphics where an „Ess“ starts. Always try to cut at a point where the waveform crosses the „zero“-line in the middle.
3. Select the „Ess“ that sounds most natural to you, and move it in place to the original one.
DE-COMPRESS VOCALS
Yes, you can bring back lost dynamics into over-compressed vocals. You simply lower the parts in the audio-file that are too loud.
Depending on what your DAW offers, there are two ways:
A. Cutting between syllables is an option when your DAW offers an individual volume/gain setting for each audio „snippet“. Of course you have to create very short crossfades between the snippets, to avoid clicks.
B. Automation nodes are available in most programs. Where in example A you would just make a cut, you will have to create two automation nodes.
This technique for de-compression can of course be used for any type of recording, not just vocals
MIX PREPARATION – MACRO MANAGEMENT
There is a presumption amongst many musicians that mixing is a very complicated process. I guess this stems from pictures of massive studios with 80 Channel mix- ing-consoles, or the mental overload created by a DAW- session that has 200+ tracks.
However many tracks the source-material has, the ob- jective is to reduce the DAW session to a size that allows us to make quick and intuitive decisions. As soon as the creative mixing process starts, time works against us. This is because objectivity disappears the more we get emotionally attached to the song we work on. You can’t just mess about for hours and not make progress.
DAWs have turned audio material, tracks, and many more aspects of a production into visuals. This can be both useful and distracting.
When it comes to getting organized, a good visual rep- resentation of your song structure and the type of au- diotracks in the song is very useful.
On the other hand, 200 tracks can turn into a nightmare if you are not properly organizing the material in your DAW.
Let me repeat: this is a process for which the best mix engineers in the world use their (world class) assistants. I do of course not assume you have one of those at hand, and my recommendation is to do this a day before the actual mix. At the very least schedule a break after. It can be done in 10 minutes.
BUILDING A DAW TEMPLATE
Once you have done the process of mix preparation a couple of times, you should start creating a template that you use every time you start a mix. The template will have things set up that are pretty much the same for all your mixes, from the way you graphically display the songs structure along with the tracks, subgroups or VCA-groups already configured, colors for these groups assigned, to aux sends and returns for your most commonly used FX preconfigured.
LET ME GUIDE YOU THROUGH IT.
• you need to create quick access to the structure of the song: a template can have a standard song structure already set up, so you can move pre-labeled markers
„You can’t just mess about for hours and not make progress.“
around (INTRO, VERSE, BRIDGE, CHORUS, etc.), once the audio is imported. In Logic Pro, the song position of those markers can directly be navigated to via the Key- boards numerical keypad. Extremely useful during mix.
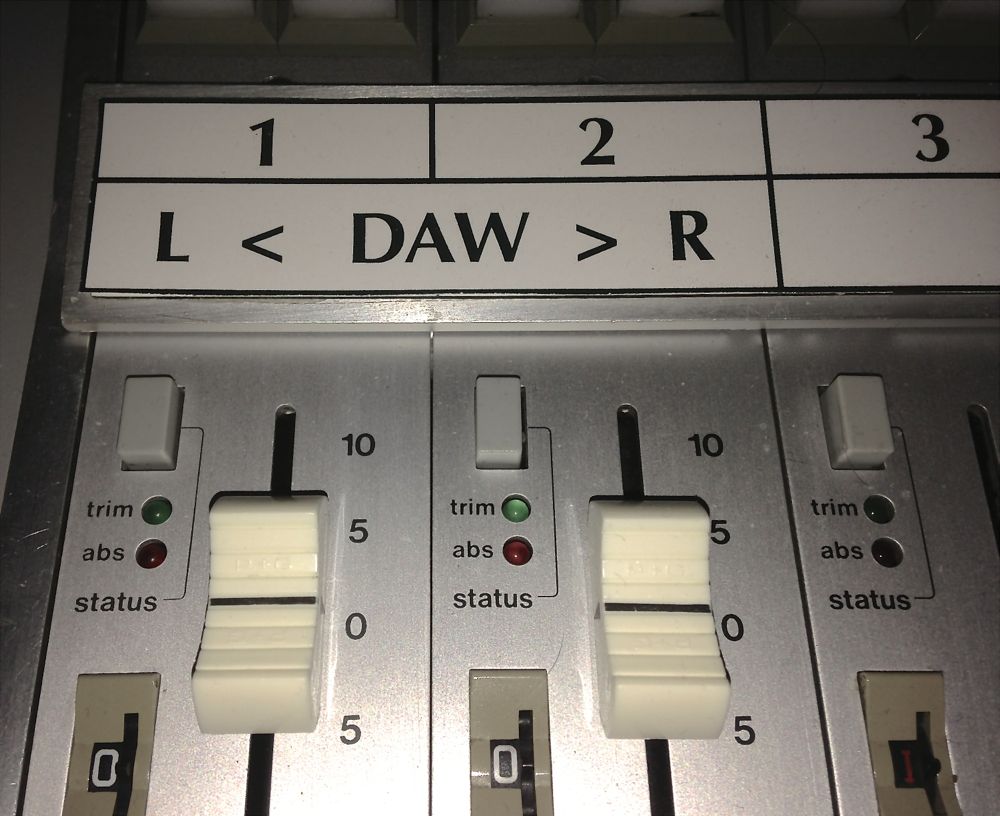
• setup basic routing and grouping: you can route groups of instruments (e.g. drums) to the same audio subgroup, and some DAWs offer VCA faders – I personally route groups of instruments to dedicated inputs on my SSL console, and group them using the VCA grouping on the console.
• setup a selection of your most important FX sends/ returns
Here’s an example:
Send 1
Standard Reverb (whatever you’ve used for years)
Send 2
Standard Delay (1/2 or 1/4 Note)
Send 3
Chorus, HPF at 300Hz
Send 4
Small Room
Send 5
Mid Size Concert Hall
Send 6
Long Church Reverb
Send 7
Large Concert Hall
Send 8
Speciality Reverb (e.g. 3D, Gates Reverb)
Send 9
Slap Back Delay (1/16 Note or shorter)
Send 10
Special FX Delays (Ping Pong, etc.)
other options would be specialised reverbs for Snare, Amp Chambers, etc. – I personally have set up 3 banks of 10 Sends each, for a total of 30 Send FX, send 1, 11, 21 are standard reverbs, send 2, 12, 22 are different delays, you get the idea…

• set up most commonly used plug-ins on the stereo buss by default, but keep them bypassed for now
• save the empty template (without any audio) to your harddrive to use with all your future mixes; keep improv- ing your template as you use new plug-ins or change your workflow
IMPORTING THE FILES
• import or drag the audio-files into your template (in Logic, dragging them all into the arrange windows cre- ates blank tracks – very useful.)
• save the mix-session to your primary data drive, al- ways make sure that all required files for your project are included in one folder (to be able to back them up to another drive by just dragging one folder over…)
• backup the folder above with all files on an external drive every few hours
• bring the imported audio into a defined order of tracks in your DAW software, build groups for the following in- strument groups, label the tracks clearly and color-code them as follows:
Drums = red
Sound FX = yellow
Bass = dark green
Guitars = light green
Keyboards = blue
Orchestra = orange
Backing Vocals = purple
Lead Vocals = pink
(yeah use different colours if you want, but know I’ve consulted an expert in colour psychology to find those colours)
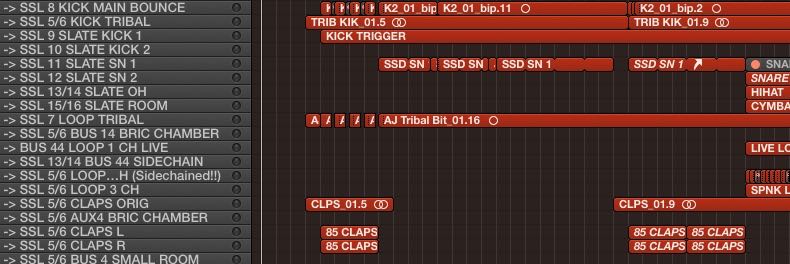
• use meaningful track names (Routing, Instrument Name) and Icons -> BUS 33 Vocals Lead
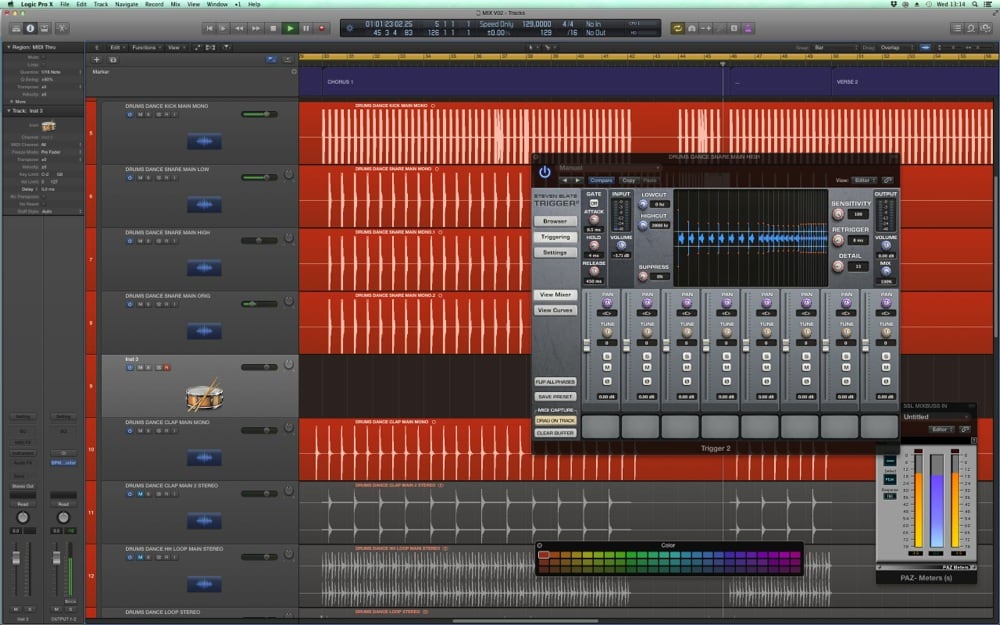
• generate triggers tracks for Kick and Snare for use with Drum Replacement Plugins – just generate the triggers for now, it is not the time to pick drum-sounds
If you use a console (like I do), you can assign the most important elements of the mix to individual channels, but make sure stereo outputs 1/2 go to untreated channels of your console that are set at unity gain. With everything in your DAW routed to stereo outputs 1/2 at the beginning, you can start using this default input on your console, and only route selected tracks to individual console channels. Your reverb returns for example would still come through the default stereo outputs 1/2.
THE CONCEPT OF „HANDLES“ AND COMPLETE CONTROL
There are various dimensions that can be controlled for every sound-source in the mix, and also on busses, subgroups and the 2-bus/master.
JUST A FEW EXAMPLES
• tonal balance – EQ, Filter
• dynamics – Compressor, DeEsser, Gate
• transients – Limiter, Saturator, Transient Shaper
• volume – Faders, Routing, Gain Staging
• room placement – Reverb, Delay, Panning, Stereo
Width
• modulation – Chorus, Flanger
Each of those require a dedicated processor (plug-in or outboard device). While some of these can be inserted as needed, you can save a lot of time by including the commonly used standards in your template, that are by-passed by default. You bypass them by default as when the signal fits in the mix as is, you might not need anything in the signal chain.
This is what I refer to creating a „handle“ on a specific aspect of your source.
Creating a handle never consists of a single „knob“ or control – even drastic changes usually consist of a num- ber of processors with subtle settings and also, even when you apply drastic settings, subtle corrections need to be made.
Basic terms like „transients“ or „dynamics“ are very technical, and rarely used by people to describe sound.

Think about how you would deal with the following requests:
• „The vocal needs more attitude“
• „The sax doesn’t sound confident enough“
• „Can you give the kick more knock“
• „I want more of a 60s vibe to it“
You need a handle on all of these. The lead vocal won’t magically sound like „more attitude“ – there is no sin- gle knob for that. The „handle“ on „lead vocal attitude“ would consist of a number of processors combined that push the sound in a certain direction.
While terms like „attitude“ will never be 100% objective, on this particular example I would first create a rich and full bottom to the sound, then add a lot of mid energy, probably around 2, 4 and 8kHz with an analogue EQ, and after that push the signal into a compressor that adds harmonics and saturates, even distorts the vocal. A final brickwall-limiter on the vocal chain would make double-sure that the vocal is always pushing and upfront, like someone with an attitude would stand right in front of you and not back off an inch.
More „knock“ on the kick? Well, perhaps knock a wood- en door, and think about what frequencies are involved?
These are just two examples for the concept of handles, but once you have mastered a variety of audio tools you will be able to create a handle on everything you need to manipulate, even when attributes used to describe the desired sound are not technical, but rather referring to emotions.
REFERENCES AND A/B-ING
What do I need to reference?
You need to be able to switch between
• the rough mix of the song you are mixing
• the untreated and mastered versions of your ste- reo bus
• a selection of references
• if you have a console or monitor controller, utilise the external inputs (drag reference songs into your mix sessions, send them to a spare pair of outputs that are patched into the external inputs)
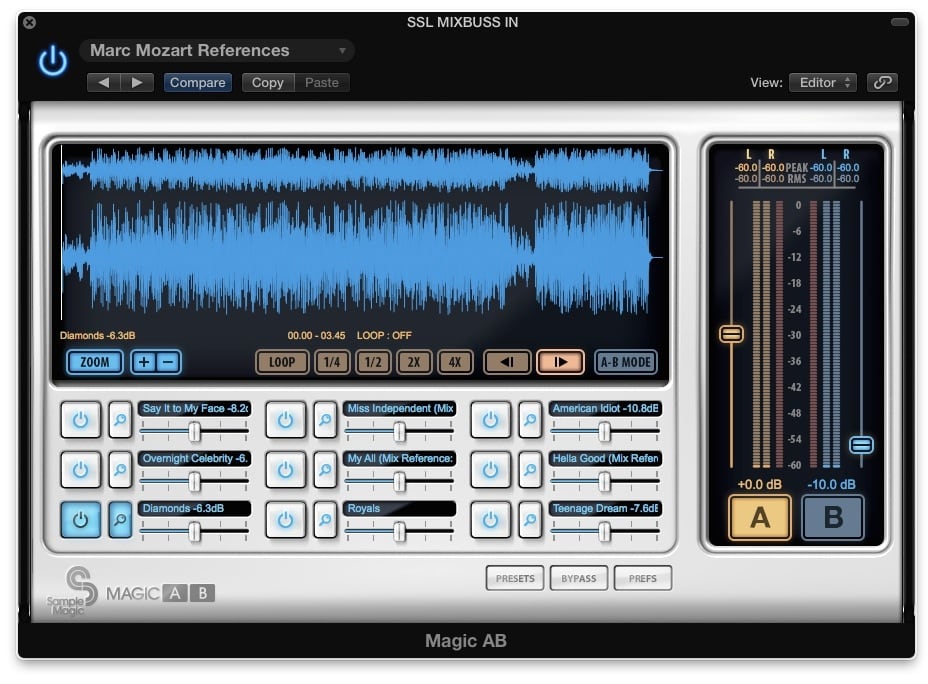
• if you don’t have external inputs, use a software so- lution like „Magic AB“ for that – it’s saves you a ton of money purchasing extra converters, hardware etc. – you just use it as your last plug-in on the master, and it handles all your A/B-comparisons and references.
What songs to pick as references?
• build a library of reference songs
• include some of the worlds biggest radio hits in your
library, to have a general reference for current loud-
ness and frequency curves
• include some well known songs in the genre of the
song you’re about to mix
• include some of your personal favourites
• if the client gave you a reference for the mix, add
that too

I use the plug-in Magic AB, which allows you to compile a selection of references, and save them as a plug-in setting.
• Magic AB will be inserted as the last plug-in on your stereo bus, and allows you to not only A/B- compare between your own mix and a reference, but also between several references with one click
• you can save a plug-in setting for different genres, and it will load all the songs with one click
• you can add all types of audio-files, even iTunes AACs that you purchased
• the audio-files can remain at their original loca- tions on the hard drive
• you can loop specific section of a reference song
• each reference can be level-matched to your own mix by ear
• you can globally compensate for the added loud- ness the references will have due to the fact they are mastered
If you found this post helpful, check out my new book which will guide you through the entire mix methodology from DAW preparation to mix delivery, the best-selling eBook YOUR MIX SUCKS.
[convertkit form=5236308]


