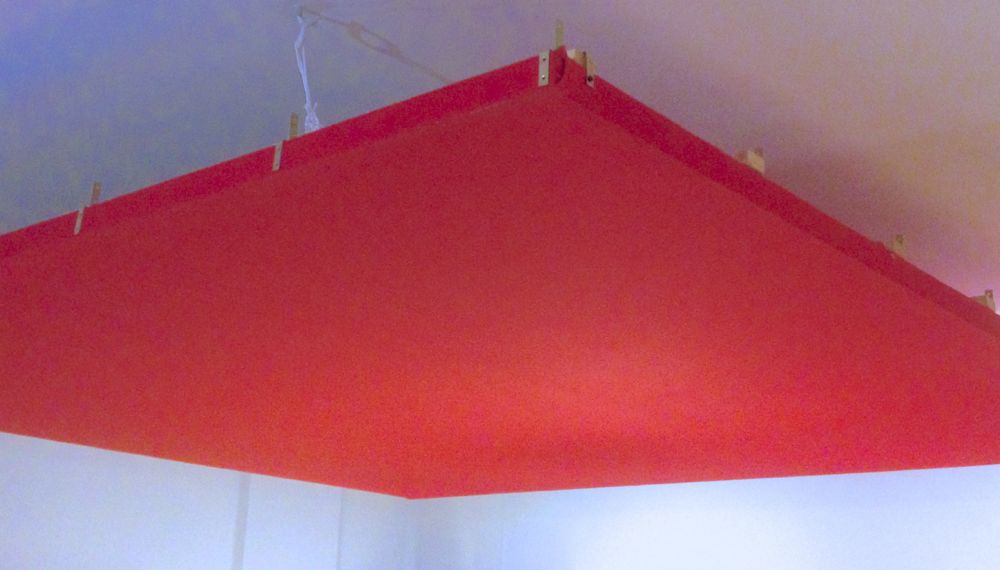
If you’re ready to go Ghetto Style with your Room Acoustics – here we go:
This is a pre-release version of the chapter on Room Acoustics, from the new book “YOUR MIX SUCKS” (available here).
The book sets out to be the Complete Mix Methodology for the entire process from DAW preparation to delivery.
Lack of Acoustic Room Treatment is the single biggest cause of frustration during the mixing process. Records are made at people’s homes today, and with the music industry on a “Titanic”-course, this won’t change any time soon.
The majority of producers are set up in an untreated small or midsize bed- or living room.
This article is not gonna give you an in-depth theory-lesson on room acoustics – instead I will show you the cheapest ghetto-way to give your mix room a massive improvement – without breaking the bank.
Don’t get me wrong: when you look into the rooms designed by folks like Northward Acoustics (currently one of the top teams in that field, just as an example), they are totally worth the money.
I’ve been involved in a few studio-builds, and you can easily spend $ 50K and more building a top quality high-end room.
If your plan is making music – DON’T DO IT! (just my 2 cents)
Instead – do the following…
Here’s the final plan for your new room:
Optionally, as you can see in the drawing, you can plaster the entire back wall with Rockwool. Adds a few hundred $ more to your bill and can further help the linearity of the low-end in your room.
This article is part of the new book “YOUR MIX SUCKS”! Check out more…
THE 10-MINUTE ROOM TEST
Here’s a YouTube-clip with test tones I’ve created with Logic Pro – you can playback this clip to do the test I’m describing below, if you want to skip setting this up in your DAW.
Be careful – this clip starts with subsonic frequencies you won’t hear in most rooms!
In about 47 seconds you will know how shitty your room sounds. Just listen and let me know if the volume of the test tone is perfectly consistent?
1. Find a test tone generator in your DAW software.
Most DAWs come with an oscillator or test tone generator for creating a basic sine-tone (if in doubt, google „test tone generator daw“ + the name of your software).
The frequency of the oscillator can be set. (You can also use a synth playing a sine-wave, THIS LIST shows the range of notes needed)
2. Turn the volume of your speakers fully down.
…to not destroy the speakers or your ears, as test tone generators can produce some nasty high tones! (which we don’t need for what we’re doing today)
3. Set the test tone generator (or synth) up.
In Logic Pro, for example, the oscillator can be inserted as a plug-in, in any track or even output.
Set the output level of the test tone to -18dB and start with a frequency of 100Hz (G2 on a keyboard).
4. Turn your speakers up slowly, until you can just hear the low 100Hz tone clearly.
Do not turn it up too much – at a low volume it will be easier for you to notice changes in level, which will be important.
5. Bring the frequency of the oscillator down, slowly – step by step.
Take your time, change the frequency gradually from 100Hz down to the lowest available frequency, but take a minute to do that.
Notice how the level of the tone keeps changing? On some frequencies the signal might seem to disappear completely, on others it’s louder than the original 100Hz tone.
If you are listening on small speakers, the tone will disappear completely when you reach a certain frequency, this could be around 40/50Hz if you don’t have a subwoofer. Keep going down to perhaps 20Hz, even if you don’t hear the tone any more.
6. Take notes of what you hear.
I’m now explaining you how to write down what we hear. Finish reading the rest of this article before you start. It’s quick and easy but there are a few steps involved.
Starting with a test tone of 20Hz, we will gradually move up the frequencies – and make notes about how we hear the volume changing.
We take notes using the simple categories
“NO TONE”
– you don’t hear a test tone
“LOW”
– you can hear it, but it’s lower than the average
“NORMAL”
– the average level of the test tone throughout all frequencies
“HIGH”
– when it’s louder than average
Click on the chart below and print it out.
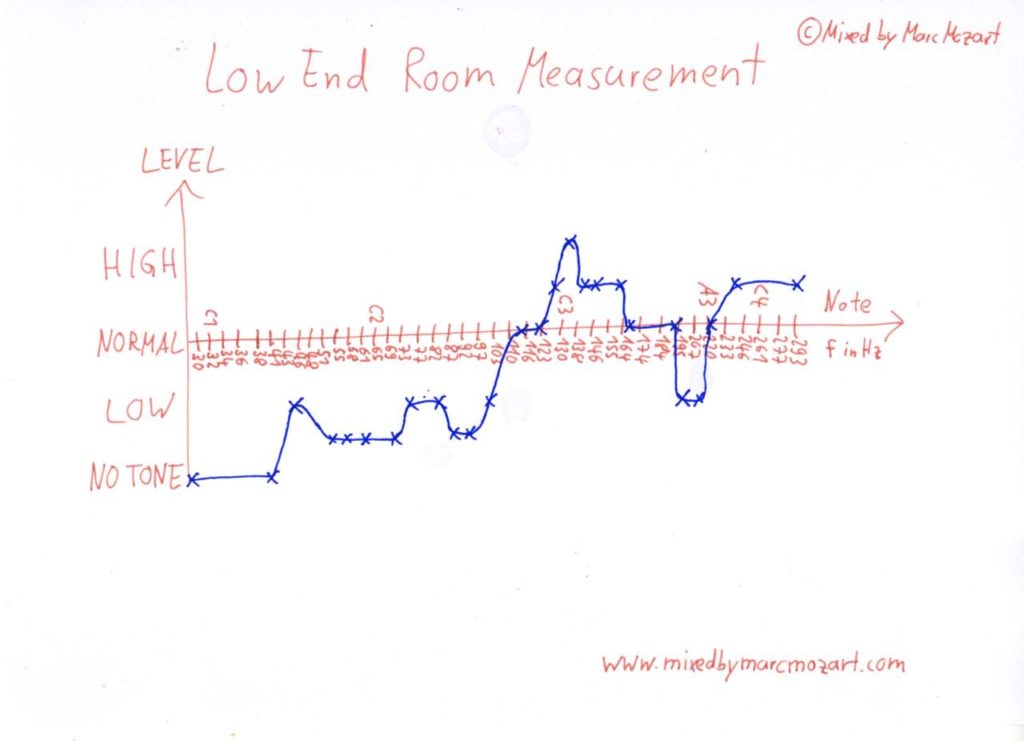
(the left arrow going up shows the level you are hearing, the arrow in the middle going to the right is for the frequency of the test tone, starting at 20Hz, going up to 293Hz)
 Once you have printed the chart (you could draw this in 2min if you don’t have a printer close by), start going up with the frequency from 20Hz all the way to 300Hz, and make corresponding little crosses on your printed chart.
The only slight challenge is that you have to look at your computer screen to see the current test tone frequency displayed in the test tone generator, while making a subjective judgement of the perceived volume.
Here is an example on how the chart of my own test looked:
 (for example, at 20Hz I heard “NO TONE” hence the cross on the bottom left, at 130Hz the tone was really “HIGH”… you get the idea)
BTW, just in case you are wondering why we won’t go above 300Hz… the low end spectrum is most important for the overall balance of your room, and it takes a lot more effort to fix this, while getting the mids and treble right (in comparison) is almost a trivial task when it comes to room treatment.
7. Once you’re done, connect the dots, and voilà – here’s the low end frequency curve of your room!!
 Note, this is the frequency response at your listening position. The measurement curve can look different by changing your listening position even a few inches. Also, the graph doesn’t tell you anything about the reverb-time of the room which is equally important (we’ll measure that in the next part).
For the graph above I did the test in my home office, which is a completely untreated and small square room with a pair of cheap active computer speakers. The results are really bad, the peak at 130Hz as well at the notch around 207Hz would make this room a serious headache to mix in.
In addition to this post, I am putting together a PDF with a list of helpful links and resources around room acoustics. From recommended manufacturers to free acoustic measurement software.
If you’re subscribed to my newsletter, you will receive the PDF in the next 24 hours. (UPDATE: still working on the PDF)
The easiest way to subscribe is the orange bar at the top of this page.
If this was helpful, so will be the eBook…
ADDENDUM
ROOM MEASUREMENT TOOLS
• REW Room EQ Wizard (free room acoustics software; PC/Mac, Java-based)
• FuzzMeasure Pro Audio and Acoustical Measurement Application (Mac)
MANUFACTURERS
• ROCKWOOL (Insulation Products)
• REALTRAPS (Bass Traps, Diffusers, Acoustics Articles/Videos)
• GIK ACOUSTICS (Bass Traps, Diffusers, Acoustics Articles/Videos)
FORUMS
• Gearslutz Studio Building / Acoustics Sub-Forum
• The Acoustics Forum at PRW (moderated by Thomas Jouanjean/Northward Acoustics)
• Recording Studio Design Forum (by John Sayers)
STUDIO DESIGNERS
• Northward Acoustics (Thomas Jouanjean)
• John H. Brandt Acoustic Designs
ROOM ACOUSTICS THEORY
• Wikipedia Article
• Five part series in Sound On Sound, by Paul White
[convertkit form=5236308]


