Damn – if only your bank account had enough headroom!
But you’re hitting “red” all too often, start calculating and things become uncomfortable.
Sounds familiar?
Exactly how people feel about their Gain Structure in mixing – „Gain Staging“ being the strategy you chose to use your bank account of dBs, if you even have a strategy…
Like your bank account, the Gain Structure of your mix needs enough headroom to be able to deal with crazy or unexpected events.
The Drums are buried in the mix, and the artist wants them „waaaay“ upfront?
OK, you start turning them up, and by the time they are where you need them, the drum-levels are up 6dB – hitting digital red on the mix bus!

This is a pre-release version of the chapter on Gain Staging, from the brand-new book “YOUR MIX SUCKS” (now available here).
The book is a Complete Mix Methodology for the entire process from DAW preparation to delivery.
I’ll start with some underlying history and theory. And then tell you exactly what to do about the problem…
Just before Digital Audio took over as a standard, early DAW manufacturers in the 1990s made a historic mistake in laying out the wrong scales for digital level meters: no warning all the way up until 0dB, so you don’t know you’re in trouble until it’s too late.
Whereas 0dB in analogue used to be a reference point for solid level, Digital Audio used 0dB as the “point of no return”.
…found this rare video of Protools V1.0 (in German)
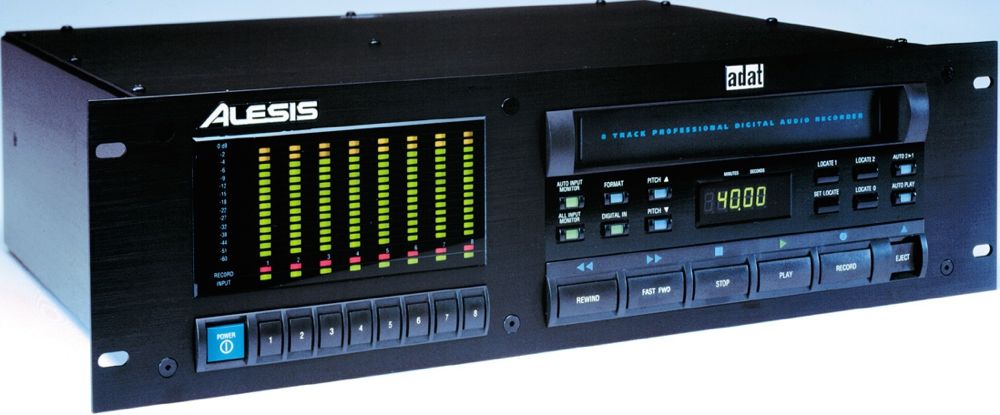
The Alesis ADAT recorder, the first digital multitrack for the mass-market, did (a little) better: it had two yellow lights at -4 and -2dB. 🙂
The Sony and Studer DASH-machines did a lot better, but they were six-figure digital multitrack-recorders that were the industry-standard until DAWs took over.
Fast forward – DAWs took over between 1991 and 1998 – Digidesign ProTools being the first and most popular one, others like Cubase and Logic followed by extending their MIDI-based sequencers with “audio”-features.
What all of them should have done from the beginning, is declaring levels higher than -18/-15dB as „yellow zone“, and -8/-5dB as „red zone“ and also make “-18 dB” = 0dB, as this is exactly what happens once the audio leaves the D/A-converter.
Prior to Digital Audio, people were not leaving a lot of headroom in analogue as it would bring up noise, and driving a signal hard to tape even had pleasant side-effects for certain types of music (tape compression, soft-clipping transients, added harmonics).
Early Digital Audio was at 16bit Resolution (96dB of dynamics in theory), and people still felt it wasn’t clever to leave a lot of headroom. They were partly right, as the combined dynamics of 16bit and early converter designs were barely reaching 90dB, best case.
From the early 2000s on though, the processing of ALL DAWs was operating at a minimum of 24bit resolution, which means you have 144dB of dynamic at hand at any time.
That of course exceeds what analogue circuits are capable of reproducing.
Even the best OP-Amps used in AD/DA-convertors can only go as far as 125dB (e.g. the LME49720), so we can plan with as much headroom as we like, it won’t affect the quality of the audio.
To cut a long story short – here’s what you need to start doing:
The easiest way to find out (in plain numbers) what type of final loudness you want to achieve, is iTunes.
1. launch iTunes on your computer
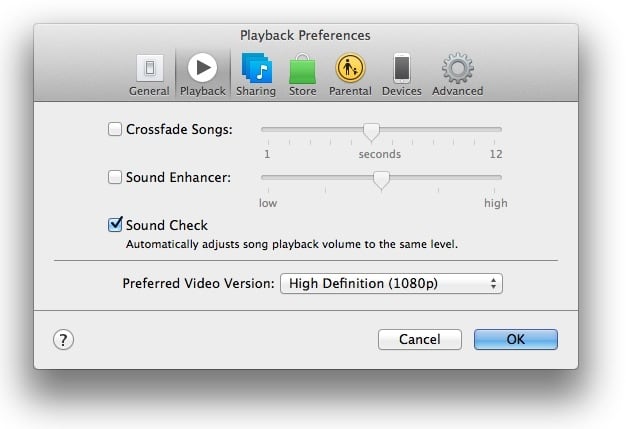
2. go to the preferences…/Playback, make sure „Sound Check“ is ON
3. create a playlist with references of songs in a genre similar to the song your mixing
(we’ll talk more about picking references in another post)
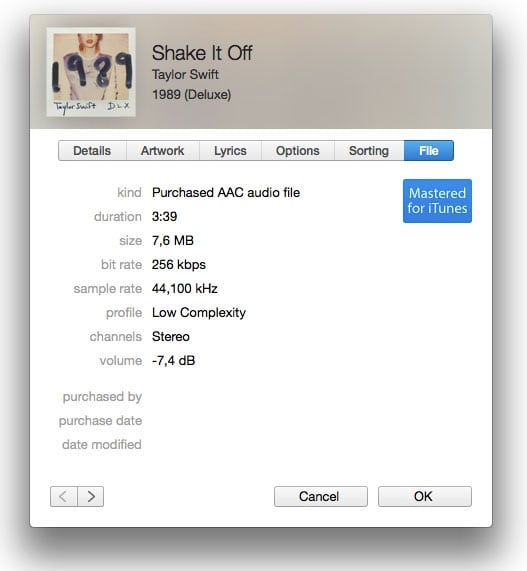
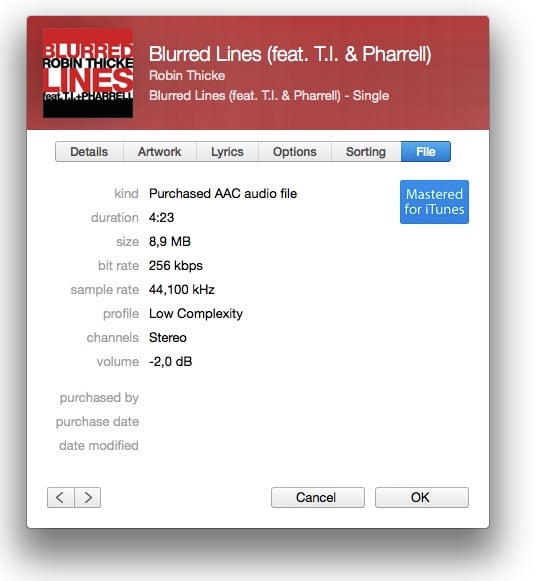
4. “Get Info“ for the song (command + i on the keyboard), chose the „File“-Tab and check the „volume“-value
5. compare these values to the value that your mix shows when you play it in iTunes.
If your references sit around – 7,4 dB, and your own mix is at – 11,3 dB, you’re too loud. If your own mix sits at – 0,4 dB, you need to find about 5dB in volume (maybe the Limiter is not making up for the headroom gain)
Here’s what you need to know about iTunes Soundcheck and Mastering Levels:
– in iTunes (the app), the „Sound Check“-option that automatically corrects all songs in your library to similar subjective playback-levels DOES affect the pre-listening in the iTunes Store as well – so no „Loudness-war“ happening on iTunes any more really.
– ALL Apple-devices have the “Sound Check”-option
– levels are not as crazy as they were, and differ from genre to genre
Some interesting examples of levels…
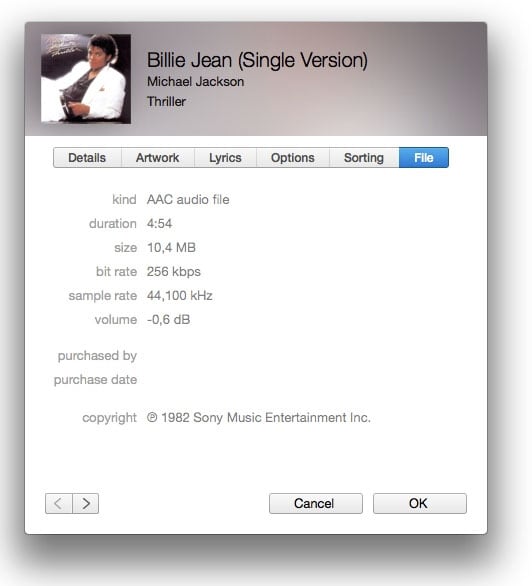
The original album-master of “Billy Jean” gets almost no level-change by iTunes.
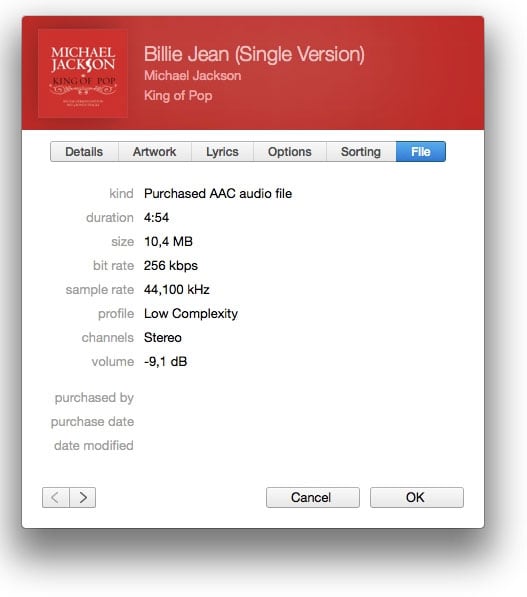
The remastered version… duh, 8,5 dB louder!!
That screams “Loudness-War”.
The transients are really squashed on this one, and the snare reverb brought up in a very unpleasant way. I can’t listen to this!
Not too bad really for an EDM-record.
Big mainstream hit-records don’t need to be squashed!
Another example for a very dynamic mainstream Top 40-hit.
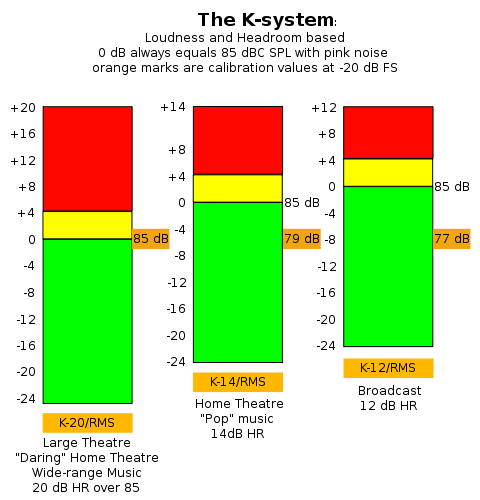
What I’m proposing here is of course not new – mastering engineer Bob Katz has done incredible work in educating audio engineers, and his „k-system“ dB-scales are implemented in a number of plug-ins you should be using to improve your gain-staging.
The K-system goes beyond levelling, it even includes standardized listening levels.
As you can see, there is plenty of stuff to talk about in future posts.
In short, iTunes has a very intelligent algorithm that measures RMS, and adjusts ALL tracks in a way that regardless of what song you’re listening to, they will all appear roughly in the same perceived loudness.
I think, they did a good job, but I’m planning to release an album on iTunes with just test-material at different levels to find out EXACTLY what happens.
The most important thing to know about this is that when your mix is extremely squashed with high RMS and little headroom, iTunes will turned it down and it will end up lower than other tracks.
If this article was useful for you, subscribe to my exclusive e-mail list, or leave a comment. I’m very happy to hear from you.
[convertkit form=5236308]


